Making Your Own Watercolor Paints from Scratch

In this guide, you will learn how to formulate, grind, and store your own professional-grade watercolor paints using raw pigments and a binder. Making your own paint allows you to control the purity of your materials, experiment with rare colors, and understand the chemical relationship between pigment and medium, which is often obscured by commercial packaging. Whether you want to use high-quality earth pigments or experiment with organic matter, this process provides a foundational skill for any serious painter.
The Chemistry of Watercolor
Watercolor paint is essentially a suspension of colored particles (pigment) within a liquid binder. The binder's job is to hold the pigment particles together and allow them to adhere to the paper fibers once the water evaporates. In traditional watercolor production, the gold standard for a binder is Gum Arabic. This is a natural hardened sap from the Acacia tree. It provides the necessary viscosity and the slight sheen characteristic of high-quality watercolors.
To create a successful paint, you need to balance three components: the pigment, the binder, and a plasticizer. Without a plasticizer, the dried paint will become too brittle and may flake off the paper. Honey or vegetable glycerin are the most common additives used to keep the paint "open" and workable. A small amount of honey also acts as a humectant, helping the paint retain a bit of moisture during the drying process.
Essential Tools and Materials
Before you begin, gather the following professional-grade tools. Do not substitute a glass muller with a plastic one; the weight and hardness of the glass are necessary for the grinding process.
- Glass Muller: A heavy, flat-bottomed glass tool used for grinding pigment into the binder.
- Glass or Ceramic Mulling Slab: A smooth, non-porous surface (like a piece of thick glass or a granite slab) where you will perform the grinding.
- Pigments: You can use dry powdered pigments. For beginners, I recommend starting with stable earth tones like Yellow Ochre or Raw Sienna, as they are more forgiving than synthetic or highly reactive pigments.
- Gum Arabic Solution: You can buy this pre-mixed, but for true control, you can make your own by dissolving Gum Arabic crystals in distilled water.
- Vegetable Glycerin or Honey: This serves as your plasticizer.
- Fine Mesh Sieve: To ensure no large pigment chunks remain in your mixture.
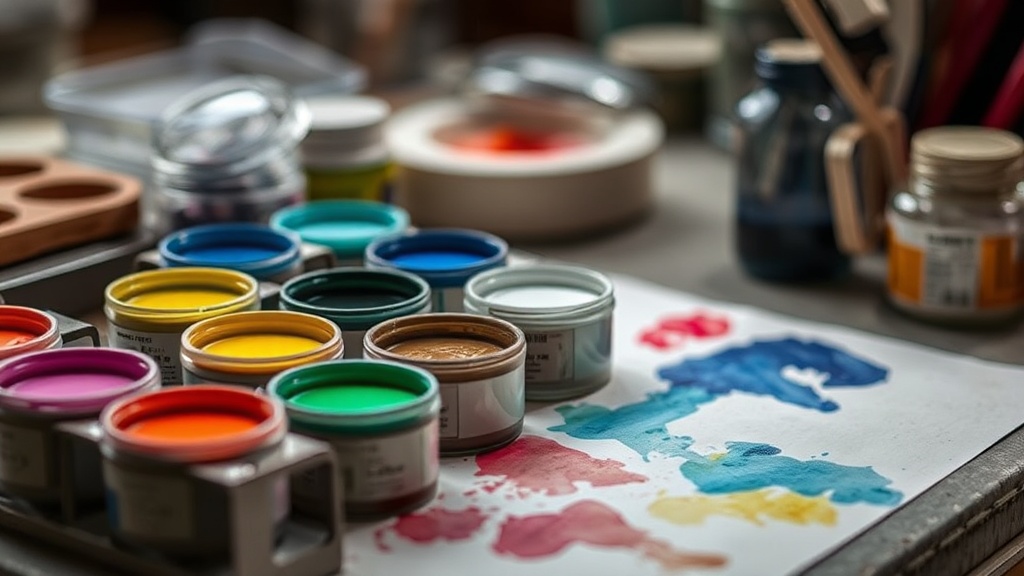
- Small Glass Jars: For storing your finished paint.
Step by-Step Production Process
1. Preparing the Binder
If you are starting from scratch, you must prepare your liquid medium first. To make a standard Gum Arabic solution, mix 1 part Gum Arabic crystals with 2 parts distilled water. Heat the water gently (do not boil) and stir in the crystals until they are fully dissolved. Once the solution is cool, add a few drops of vegetable glycerin. This ratio ensures the paint remains usable and doesn't turn into a hard, unworkable brick once it dries in the pan.
2. Measuring the Pigment
The ratio of pigment to binder determines the "strength" and "body" of your paint. A general rule of thumb for a medium-strength paint is a 1:1 ratio by weight, but this varies depending on the pigment's density. For example, heavy mineral pigments like Cobalt Blue will require more binder than lighter, organic pigments. Use a digital scale for precision rather than volume measurements.
3. The Mulling Process
This is the most critical stage. Place your dry pigment in a small pile in the center of your glass slab. Create a small well in the center of the pigment pile, similar to how you would treat flour when baking. Pour a small amount of your prepared Gum Arabic solution into the well.
Using the glass muller, begin a circular grinding motion. You are not just stirring; you are applying downward pressure to crush the pigment particles and force them into the binder. The goal is to achieve a completely smooth, homogeneous paste. If you feel any grit or graininess under the muller, continue grinding. This process can take anywhere from 15 to 30 minutes per color. A well-milled paint will have a much smoother flow and better transparency than one that is rushed.
4. Testing for Consistency
To check your progress, take a small amount of the paste and smear it onto a scrap piece of watercolor paper. If the stroke looks streaky or shows visible grains, it needs more mulling. If the paint is too thick and refuses to flow, add a drop more of the binder. If it is too runny and lacks body, add a tiny bit more pigment. Once satisfied, pass the mixture through a fine mesh sieve to catch any unground particles before final storage.
Storage and Lonation
Once your paint is ready, transfer it into small, airtight glass or plastic pans. It is best to let the paint "cure" for a few days before heavy use. During this time, the pigment and binder settle into a stable state. If you find the paint is drying too quickly in the pan, you can add a single drop of honey to the jar to help retain moisture.
Store your handmade paints in a cool, dark place. Sunlight can degrade organic pigments and affect the stability of the Gum Arabic. Because these are handmade, always label your jars with the pigment name and the date of production. This is especially important if you are using non-standard or botanical pigments, as their lightfastness may vary.
Common Mistakes to Avoid
Using Tap Water: Always use distilled or deionized water. The minerals and impurities found in tap water can react with your pigments, causing unexpected color shifts or even making your paint go rancid over time.
Over-adding Glycerin: While glycerin is necessary, adding too much will make your paint "slimy" and prevent it from ever truly drying. This can lead to issues with layering, as the paint may stay tacky and bleed into subsequent washes. If you are interested in how different textures affect your work, you might enjoy reading about adding texture to watercolor washes, which relies on the controlled drying of the medium.
Inadequate Grinding: Many beginners stop grinding too early. A professional-grade paint requires significant physical effort to mill. If you don't spend the time to break down the pigment particles, your paint will feel "chalky" on the paper and will not exhibit the beautiful transparency that makes watercolor such a versatile medium.
Advanced Experimentation: Natural Pigments
Once you have mastered the basic formula, you can move beyond commercial powders and look toward the natural world. You can create pigments from various sources, such as charred wood (for black/grey), crushed stones, or even certain botanical elements. For instance, if you have experience with natural dyes, you might find the transition to making pigment from materials like those used in natural indigo dyeing to be a logical next step in your artistic journey.
When working with found materials, remember that "natural" does not always mean "lightfast." A pigment made from crushed berries will be incredibly vibrant but will fade rapidly when exposed to light. For professional work, stick to mineral-based pigments, but for experimental sketchbook work, the unpredictability of organic matter can be a rewarding part of the creative process.
Summary Checklist for Success
- Precision: Use a digital scale for pigment-to-binder ratios.
- Purity: Use distilled water and high-quality Gum Arabic.
- Patience: Spend at least 15-20 minutes mulling each batch.
- Testing: Always test a small swatch on paper before final storage.
- Labeling: Record the pigment and the date to track aging and lightfastness.
Steps
- 1
Prepare your pigment and binder
- 2
Grind the pigment with a muller
- 3
Add liquid binder slowly
- 4
Let the paint cure in pans