Brewing Botanical Inks: Turning Kitchen Scraps into Vibrant Liquid Pigments

A heap of discarded avocado pits sits on a cutting board, their flesh a pale green, while a pile of onion skins—deep ochre and burnt sienna—rests next to a handful of bruised blueberries. To a typical cook, these are kitchen scraps destined for the compost bin. To a visual artist, they are a concentrated source of organic pigment waiting to be unlocked. Creating botanical inks is not about following a rigid laboratory formula; it is about understanding how heat, pH levels, and mordants interact to transform biological matter into a fluid, pigmented medium suitable for calligraphy, sketching, or watercolor layering.
The process of extracting color from plant matter is a fundamental skill that bridges the gap between chemistry and fine art. While commercial inks are often synthetic and standardized, botanical inks offer a spectrum of "living" colors that possess a unique, organic depth. These pigments can range from the translucent, ethereal tones of a steeped chamomile flower to the dense, opaque blacks derived from charred oak gall or even burnt coffee grounds. By mastering this technique, you move beyond being a mere consumer of art supplies and become a producer of your own unique palette.
The Essential Toolkit: Equipment and Materials
Before you begin the extraction process, you must assemble a kit of tools that can withstand heat and facilitate the straining of fine particles. You do not need expensive laboratory glassware; a functional home studio setup is perfectly adequate.
- Double Boiler or Slow Cooker: Direct heat can scorch organic matter, destroying the delicate pigments. A double boiler provides a gentle, indirect heat that preserves the integrity of the color.
- Fine Mesh Strainer and Cheesecloth: You will need to separate the liquid pigment from the spent plant material. A standard kitchen sieve is a start, but a layer of cheesecloth or a coffee filter is necessary to catch the microscopic sediment that can clog a dip pen or a brush.
- Glass Jars: Use Mason jars or similar glass containers for storage. Glass is non-reactive, ensuring that your ink does not pick up metallic or plastic tastes/odors that could affect the pigment's stability.
- Digital Scale: Precision is key when you move from making "dye" to making "ink." You will need to weigh your plant material against your liquid volume to ensure consistency.
- pH Strips: These are vital for the "color shifting" stage, where you manipulate the acidity or alkalinity to change the hue of the liquid.
As you begin experimenting with these materials, you might find interest in unexpected household items that make incredible art supplies, as many of the tools required for botanical ink-making are already sitting in your pantry.
Phase 1: The Extraction Process
The first step is the extraction of the pigment from the biological source. This is essentially a concentrated decoction. The goal is to pull as much color as possible out of the cellular structure of the plant material and into a liquid base.
Selecting Your Botanical Sources
Different materials yield vastly different results. For a warm, earthy palette, look toward onion skins (yellow and red varieties) or turmeric. For deep, moody tones, consider black tea or coffee. If you want to experiment with the subtle, pale tones of spring, use hibiscus flowers or beet scraps. Avocado pits are particularly fascinating; while they look green, they actually yield a rich, dusty pink when processed correctly.
The Extraction Method
- Prepare the Material: Chop your plant matter into smaller pieces to increase the surface area. For example, if using onion skins, don't leave them whole; tear them to expose more surface area to the liquid.
- The Ratio: A standard starting ratio is 1 part plant material to 2 parts liquid. If you have 100g of onion skins, use 200ml of water.
- Simmering: Place your material and liquid in a double boiler. Simmer on low heat for 45 to 60 minutes. Do not let the liquid reach a rolling boil, as excessive heat can "cook" the pigment, turning a vibrant red into a dull brown.
- Straining: Once the liquid is highly concentrated, turn off the heat. Pour the mixture through a fine-mesh strainer, then through a double layer of cheesecloth. This is the most critical step for a smooth ink. Any remaining particulate matter will settle at the bottom of your jar and can ruin a fountain pen or a technical drawing pen.
Phase 2: Refining and Stabilizing the Ink
At this stage, you have a "botanical tea." While beautiful, this liquid is unstable; it will fade quickly when exposed to light and lacks the viscosity required for writing or painting. To turn this liquid into true ink, you must add a binder and a stabilizer.
Adding the Binder
A binder gives the pigment "body" and allows it to adhere to the surface of your paper. For a traditional ink, Gum Arabic is the gold standard. It provides a slight sheen and helps the pigment stay suspended in the liquid. For a more modern, fluid ink suitable for brushwork, you might experiment with a very small amount of honey or even a diluted cornstarch solution, though Gum Arabic remains the most professional choice for artists.
If you are interested in the deeper chemistry of pigments, you may enjoy reading about the alchemy of pigment and hand-crafting your own watercolors, as the principles of binding and suspension are nearly identical.
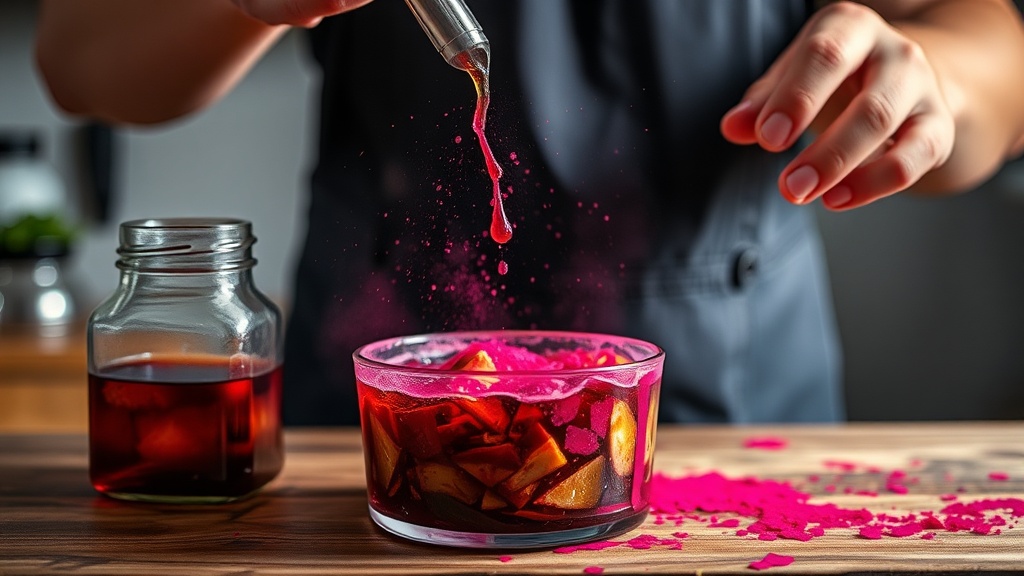
The Magic of pH Manipulation
This is where the real artistry happens. Many botanical extracts are pH-sensitive, meaning they change color when the acidity or alkalinity is altered. This is known as a "modifier."
- To Acidify (Make more acidic): Add a few drops of lemon juice or white vinegar. For example, a red cabbage extraction will turn a vibrant pink or bright red when an acid is added.
- To Alkalize (Make more alkaline): Add a small amount of baking soda or wood ash solution. Using the same red cabbage example, adding a base will shift the pigment from pink to a deep, moody blue or even green.
Always add your modifier in tiny increments—literally a single drop at a time—and stir thoroughly. You can test the new color on a scrap piece of watercolor paper to see how it dries, as the color often shifts slightly as the liquid evaporates.
Phase 3: Preservation and Storage
Because you are working with organic matter, your ink is susceptible to mold and bacterial growth. To ensure your hard work doesn't become a science experiment gone wrong, you must preserve it.
The Role of Preservatives: A small amount of clove oil or a few drops of high-proof alcohol (like vodka or isopropyl alcohol) can act as a preservative. Clove oil is particularly effective and adds a pleasant, subtle scent to your studio. If you are making large batches, a tiny amount of professional-grade preservative like Fenacol can be used, but for most hobbyists, a drop of alcohol is sufficient.
Storage Best Practices: Store your finished inks in amber glass bottles. Light is the enemy of botanical pigments; UV rays will break down the organic bonds and cause your colors to fade (a process known as lightfastness issues). Keep your bottles in a cool, dark place, such as a dedicated art cabinet or a drawer, away from direct sunlight.
Practical Applications in Your Art Practice
Once you have your vials of pink avocado, blue cabbage, and ochre onion ink, how do you use them? The versatility of these liquids is immense, but they behave differently than commercial paints.
Calligraphy and Ink Drawing
For dip pens and fountain pens, your ink must be very finely strained. If the ink is too thick or contains too much Gum Arabic, it will clog the nib. I recommend testing your ink on high-quality, acid-free paper like Arches or Fabriano. The absorption rate of the paper will dictate how much the ink "bleeds" or spreads.
Watercolor Layering and Glazing
Botanical inks are perfect for glazing. Because they are often translucent, you can build depth by layering one color over another. For instance, a light wash of yellow onion skin ink topped with a transparent layer of blue-shifted cabbage ink will create a beautiful, natural green. This technique requires patience and a deep understanding of how colors interact on the page. For more on this, explore the nuances of mastering the art of glazing with watercolor.
The Artist's Mindset: Embracing Imperfection
The most important thing to remember when working with botanical inks is that they are inherently unpredictable. A batch of turmeric ink might be a bright, sunny yellow one month and a muted mustard the next, depending on the potency of the roots you used. This is not a failure of your technique; it is the nature of the medium. Embrace the variations. The slight shifts in hue and the organic "imperfections" are exactly what give botanical art its soul and distinguishes it from the sterile, mass-produced aesthetic of the modern world.
Steps
- 1
Collect and Prep Your Scraps
- 2
Simmering the Pigment
- 3
Straining the Liquid
- 4
Adding a Binder for Consistency